********************************************************************
Today's contributor to this Trash to Treasure Transformation series is none other than Michelle of TenJune. Career woman by day, design blogger by night and baby on the way - she is a woman after my own heart! I might say we live parallel lives if she wasn't so more gorgeous and charming! Her blog features some of the best of the web when it comes to simple yet clever design projects.
Today's contributor to this Trash to Treasure Transformation series is none other than Michelle of TenJune. Career woman by day, design blogger by night and baby on the way - she is a woman after my own heart! I might say we live parallel lives if she wasn't so more gorgeous and charming! Her blog features some of the best of the web when it comes to simple yet clever design projects.
*******************************************************************
One of my favorite "trash to treasure" home decor finds all started with some old wooden boards that I found in my basement. With a little bit of creativity and some paint, I turned the boards from trash into a sentimental sign for my living room!
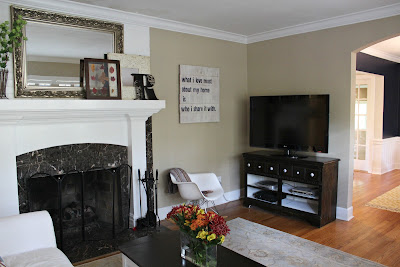
After looking around stores and not seeing a rustic sign that I wanted, I decided to shop my house and make my own sign. What do you know, I found everything I needed to make a rustic wooden wall sign. That means this project was free. I said FREE people! Doesn't get any better than that.
I was thrilled when I found these old wooden boards in my basement- the perfect size, beaten up and rustic looking. Perfect for my project! I simply nailed them together by using support braces on the back. And yes, I do mean me. Prepare to be amazed-- I did this project all by myself.
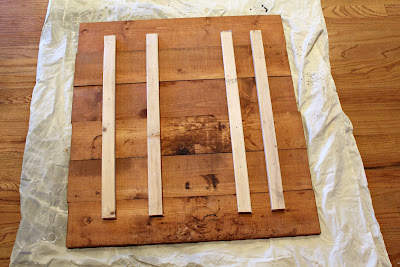

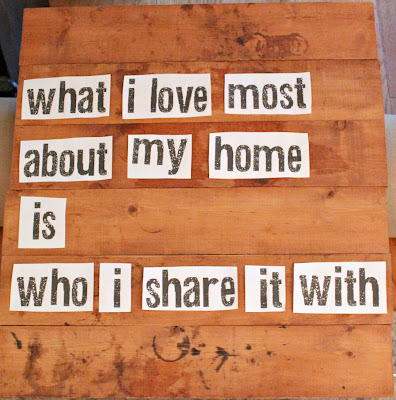
Next up, it was time to paint these bad boys. Before I painted the entire surface of the sign, I played around with the lettering. I simply printed off the quote I wanted to use and moved the words around (ensuring that the font size I choose- 300!) fit the board the way I wanted it to to.

Once I knew the wording would fit, I got to work on painting the entire surface of the sign. I decided to continue my love affair with all things fresh and white in my living room (yes, we've gone through about 97 gallons of white paint! ha), but decided to go with a whitewash effect instead of simply painting the boards. Gotta let that gorgeous rustic character shine through.
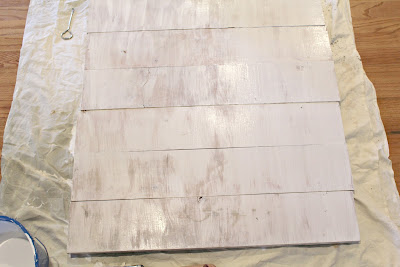

To get the whitewash effect, I simply mixed two parts latex paint with one part water. Then I just slopped it on! The watery paint absorbs easily into the wood, so you might have to do two light coats like I chose to do.
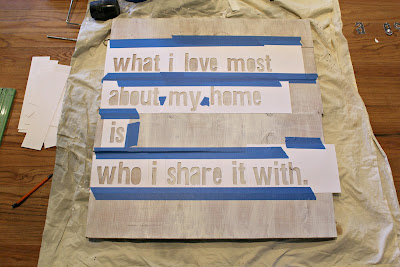

Next it was time to paint the letters. I printed the words onto heavy card stock paper (I thought it would be less resistant to bleeding or tearing once it was covered with wet paint) and then used a craft knife to cut the shape of the words out. The process was a little time consuming, but not too bad... and I promise, I am not a patient person! Then I taped the handmade stencils onto the surface of the boards and used a sponge roller to paint the letters! Easy as pie.
I'm kind of in love. Ok, not kind of.... the piece is maj as Rachel Zoe would say. It's like that wall has been waiting for the sign all along! I chose the navy paint we used in our dining room for the lettering- I thought it would add another element to tie the rooms together.
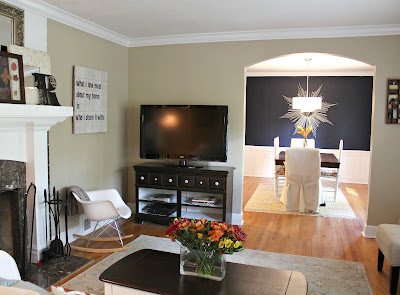


I couldn't be happier with my new sign! And I just can't believe it was FREE! Love.
To learn more about my living room projects and sources, check out this post.
To learn more about my living room projects and sources, check out this post.
Thanks so much for having me over, S! This blog is a mecca for "from trash to treasure" items, so thanks so much for inspiring us all of the time! : )


I really like the way Michelle connected the planks. I've been wanting to do something similar with barn boards we have. This is inspiring me.
ReplyDeleteGreat idea. I'll have to do me that. I wonder if there's an easier way to make the stencils though...
ReplyDeleteLOVE Michelle's project. I even had a client replicate it. Well done, friend.
ReplyDeleteI love this!! So pretty and it's nice how the color ties the two rooms together.
ReplyDeleteLove this idea! Looks really good with the room!
ReplyDeleteLove the saying!
ReplyDeletewhat a lovely home
ReplyDeleteThe sign is gorgeous and you made the home made stencil look so easy!
ReplyDeleteI really don't want to sound like a critical jerk here because I love the idea and the finished product but the sentence is grammatically incorrect. It should be "whom," not "who." You wouldn't say, "What I love most about my home is he or they," you'd say, "What I love most about my home is him or them," so you'd use the objective case of "whom" because what is being loved is the object.
ReplyDeleteAgain, I say this not out of malice but as a person who is just trying to be helpful.
Jenna